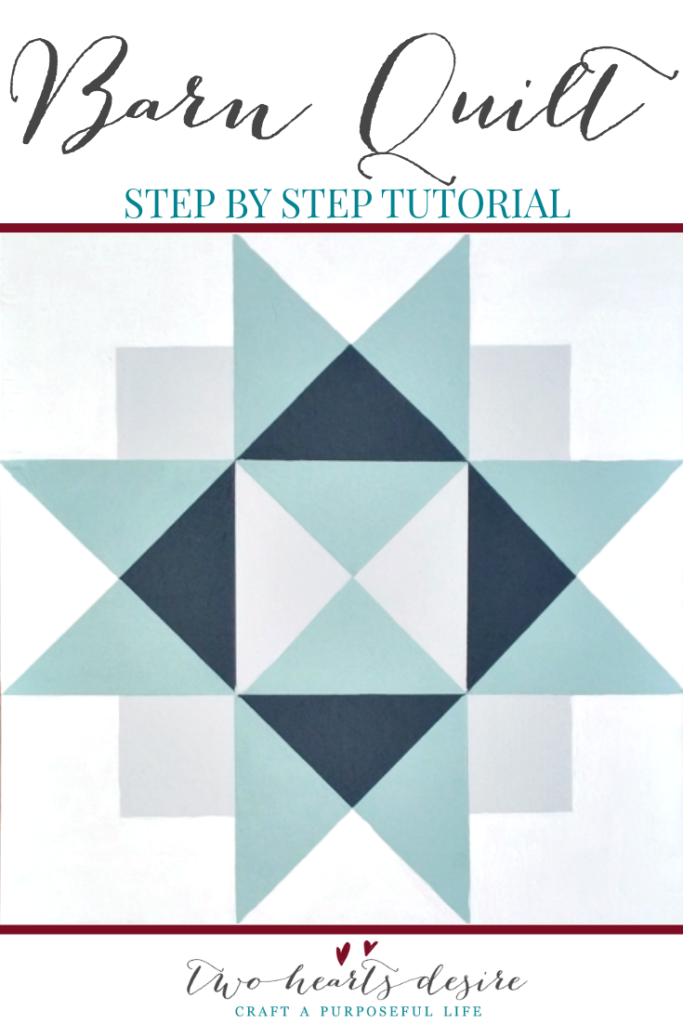
Let’s Get Crafty!
This DIY painted barn quilt is a quick project unless you hurt your back and end up snacking on ibuprofen and stuffing ice packs down the back of your underwear. (Ask me how I know!)
Here’s what you’ll need.
Supplies
- Graph paper
- Ruler- I talk about my favorite ruler on my Catalog of Favorites page.
- Pencil
- Colored pencils/crayons/markers (to shade in your color choices on paper)
- Blue painters tape
- Paint brushes
- 4 Paint colors- I used acrylic paint but any paint will work
- Wood- I used a 12 inch square
Directions
On Graph paper
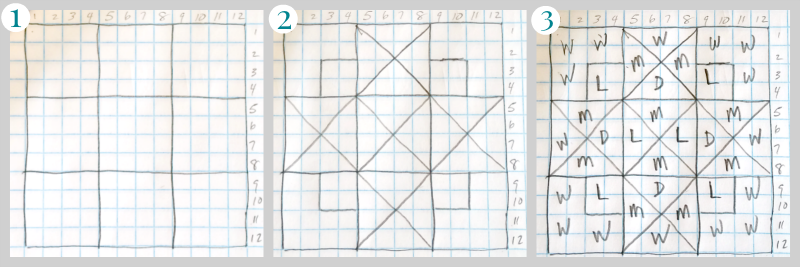
Think of a grid of 9. Grab your graph paper and number the squares 1-12 across and down one side.
(Each square represents 1 inch.)
- Mark your lines at 4 and 8 inches both ways. (pic #1)
- Divide up the individual sections as shown. (pic #2)
- Once your sections are drawn out, Label Label Label!
I used W- White / L- Light Gray/ D- Dark Gray/ M- Seafoam
Prepping your design on wood
Transfer the pattern to a blank piece of paper.*optional
Paint the whole piece of wood with your “W” color.
Mark your lines LIGHTLY! (Don’t be me and draw your lines so dark it took extra coats to cover my pencil marks.)
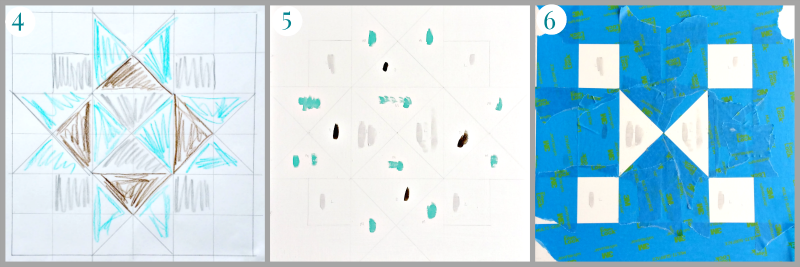
*To make sure I don’t completely space out , I dab a TINY bit of the correct paint color in each section once I’ve marked my lines. (pic #5)
Blue painters tape is your friend.
Once your wood is dry from your base color, paint the section that has the lightest color.(For me it was Lt. Gray)
Paint as many coats as you like. I wanted it to be completely covered, so I did 3 coats.
Let it dry in between each coat. (If you don’t, you’ll just smear the paint around without adding coverage.)
Once you’ve applied the final coat, remove the tape.
Set it aside to dry completely so that you won’t lift paint when you tape off your next color section.
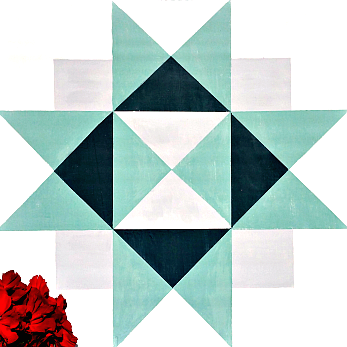
Keep working this way until your pattern is finished and you can bask in the glory of your Barn Quilt skills!
Final thoughts
If you’d like to make a larger size, I’d recommend 24 or 36 inches.
You use the same grid of 9, just in a larger size. (I did that for the 36 inch barn quilt  I made for our front porch.) Find more inspiration for block designs at Patchwork Square.
Finally, If you’re a person that needs to see a demonstration, head over to Facebook and watch me talk you through all the steps.
Go make your very own painted barn quilt!
Tag me on instagram and show me, ok?